Wall tablet for a smart home
The first version of the smart home management tablet

About product
Mykuca is a product for property management companies and their clients. It includes an admin panel for employees, a mobile app for clients, and a new addition: the wall tablet.
The admin panel helps to create polls, news, and promotions for clients, process customer requests, organize work, configure intercom and video surveillance, monitor meter readings in buildings, add new meters, and manage smart devices.
Now the product includes a wall tablet for managing smart devices. Our construction company has built a smart building. Buyers will immediately have access to a set of smart devices that connect to specific apartments through a special device.
In mobile app clients can submit requests to the management company, manage their smart devices, and stay connected with other residents in the building or complex. Additionally, they can view home cameras, open intercoms, read updates from the management company, and participate in surveys.
The first iteration
The tablet is the new part of the product
The initial tablet version includes a set of functions that will expand over time. Presently, smart homeowners of Mykuca can manage a variety of devices, monitor cameras in real time, open intercoms, gates, and barriers, and check the weather.
Currently, only engineers can add smart devices to apartments. They do this using a separate admin panel. Users can only view devices, configure them, and add them to their favorites on the home screen.
The next version will include the ability for users to add smart devices, create scenarios for device management, view camera archives, and add car numbers for automatic gate opening.
Task
Design a user-friendly interface for managing smart devices on the tablet in 3 color themes. The interface should dynamically adjust based on the number of device characteristics. All of them should fit the tablet screen. Consider control elements for the devices and their operational logic within backend constraints.
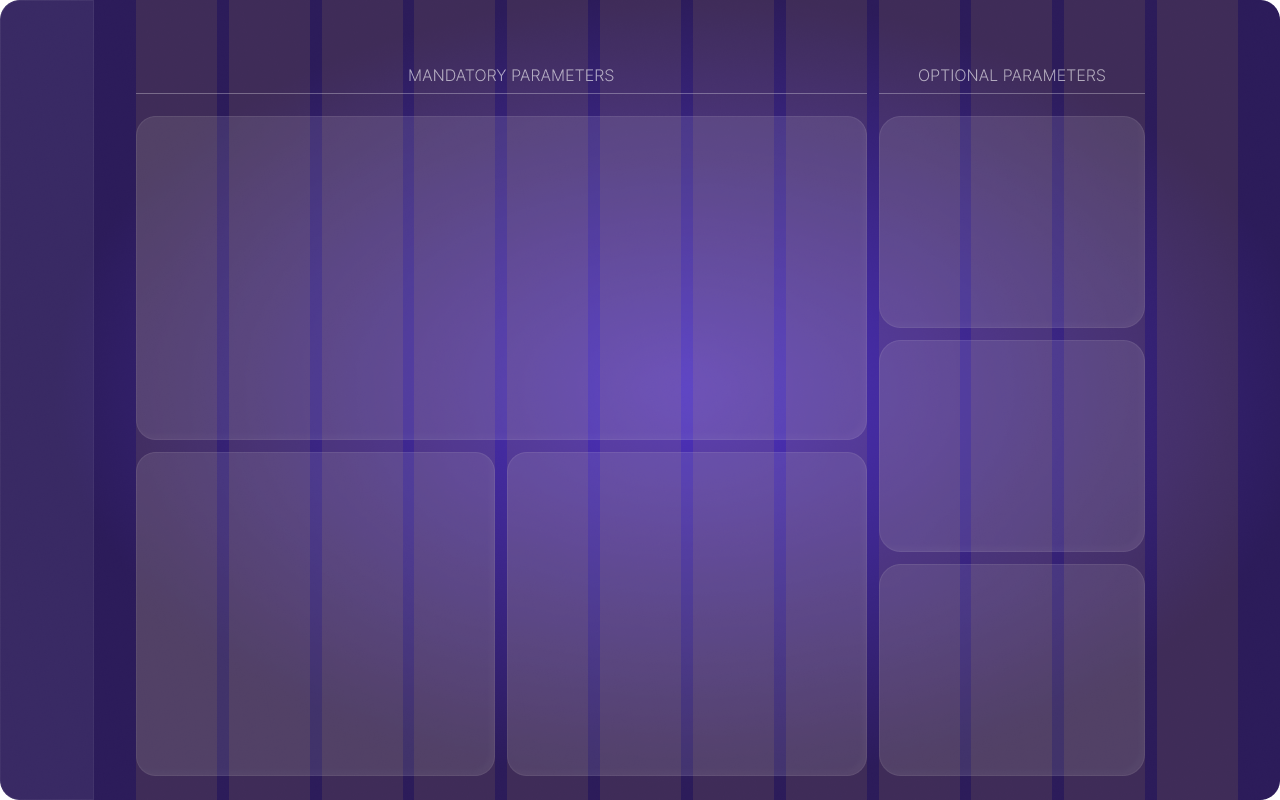
Grid and device parameters
Each smart device includes a set of mandatory and optional parameters. The optional parameters are characteristics of the device work. The mandatory parameters are the indicators and controls of the device. Every device page may have 0 to 4 optional parameters and 1 to 4 mandatory parameters. All of them may or may not be present on the page.

Solution
I needed to design tablet screens in both horizontal and vertical orientations to fit all device parameters. I designed a grid where each parameter is a widget. The widgets adjust their size and position based on the number and type of parameters received from the backend.
-
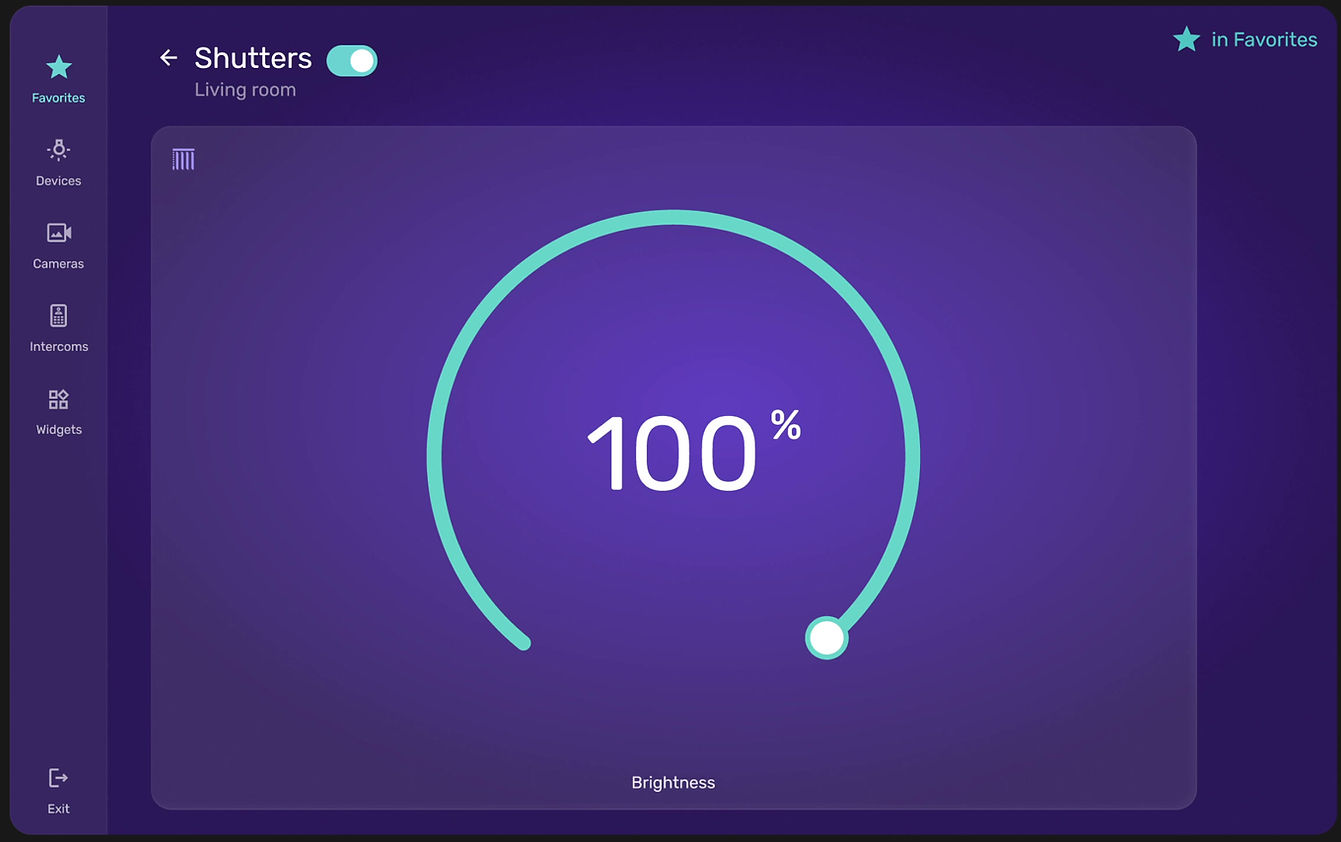
I put On/Off mandatory option near device title, so I need 3 mandatory widgets out of 4.
-
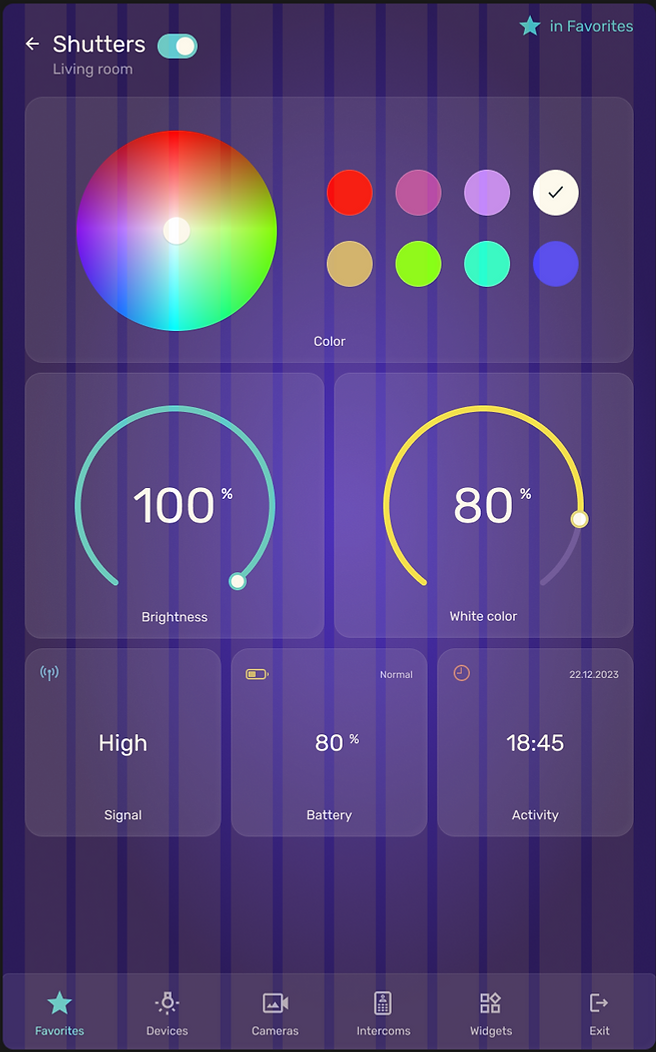
And combined Battery low power and Batter percentage parameters into one widget also, so I need 3 optional parameters out of 4 either.
For the vertical tablet layout, the grid has been slightly adjusted. All widgets maintain the same height in both vertical and horizontal orientations, with only the width varying.

The main screen grid
The same grid layout is used for smart device widgets on the 'Favorites' page. In the initial version, all cards are uniform in size, except for the weather card. Currently, resizing is not supported but now it is possible to swap the cards. Future updates will include larger cards with more functionality.

Smart device widgets and their functionalities on the main screen
Smart device widgets on the main screen allow users to view cameras, monitor sensor readings, and quickly control devices. While the widgets offer limited functionality, all features are accessible on the device’s page. To add a widget to the 'Favorites' page, it's necessary to open the device page and click the 'to Favorites' button in the top right corner.


Intercoms and cameras
In the first version, users can view cameras and access intercoms. These functionalities are separate, so they are placed on different pages in the main menu. However, since intercoms often have cameras, the pages are quite similar. Future versions will include the ability to view camera archives.


Intercom options
The user can switch between intercom pages from the top and directly open the intercom, pressing the buttom with a lock. If a camera is available, the sound can be muted. Additionally, there is a standard feature to add the device to Favorites.
The components are positioned on the page to align with the typical placement of camera information, which is usually found in the top left and bottom right corners. This includes details such as the date, type, and name of the camera.

When the intercom has a camera and someone calls, the video from the intercom appears over any screen, offering three options: end the call, open the door, or answer. This pagge doesn't allow to change intercoms, obviously.

If the intercom lacks a camera and someone calls, a popup will appear on any screen. User will have the same options: open the door, cancel the call, or answer.
